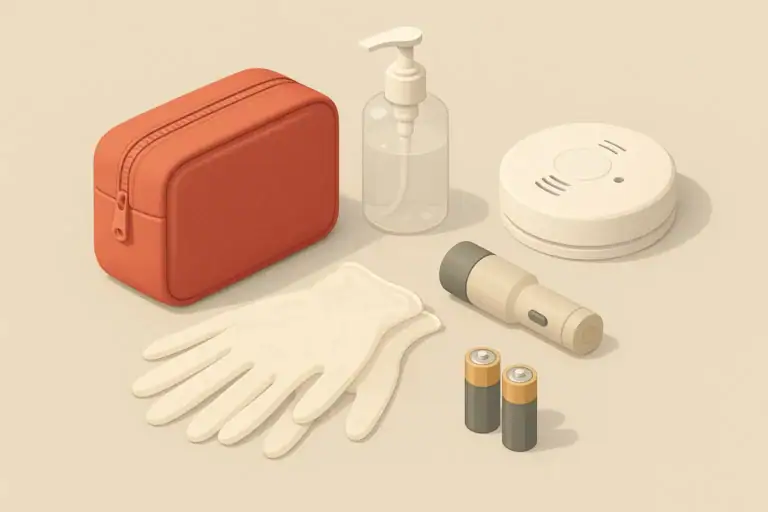
Why Smoke and CO Alarms Matter in Everyday Readiness
Smoke alarms and carbon monoxide (CO) alarms are quiet workhorses in home safety. They support everyday readiness for realistic situations: a forgotten pan on the stove, a furnace problem on a winter night, or smoke drifting in from a nearby fire. You may never need them, but if something goes wrong, they give you time to wake up, think clearly, and act.
In most U.S. homes, basic alarms are inexpensive and easy to install. The real challenge is making sure they are:
- In the right places
- Working, with good batteries or reliable power
- Clean and tested on a regular schedule
This guide focuses on practical placement, battery checks, and maintenance for apartments, rental homes, and houses, with simple routines you can keep up over the long term.
Where to Place Smoke Alarms
Correct placement is the single most important factor in how well smoke alarms can warn you. Smoke rises and spreads along ceilings, so most residential alarms are designed to be mounted high.
Basic placement guidelines for most homes
For a typical apartment or house, common guidance includes:
- Inside every bedroom or sleeping area so people hear the alarm even with doors closed.
- Outside each separate sleeping area in the hallway or common area.
- On every level of the home, including finished basements and habitable attics.
- Near stairways, because smoke can travel quickly through vertical spaces.
If you live in a studio apartment, one well-placed smoke alarm can often cover the sleeping and living area, with another near the kitchen entrance if possible.
Height and distance from walls
Placement details affect how quickly the alarm senses smoke:
- Ceiling mounting: Place alarms in the center of the ceiling when practical. If not centered, keep them at least several inches away from the nearest wall.
- Wall mounting: If you must mount on a wall, place the alarm high on the wall, within about a foot from the ceiling.
- Avoid corners: Do not mount alarms right in ceiling corners where air can be stagnant.
Kitchen and bathroom areas
Cooking steam and shower humidity can cause nuisance alarms if detectors are too close. Rather than removing or disabling an alarm, adjust placement if your layout allows:
- Keep smoke alarms several feet away from stoves and ovens.
- Avoid placing them directly outside bathrooms with frequent steam, if you have another reasonable location nearby.
- Use exhaust fans and lids on pots to reduce nuisance alarms instead of taking batteries out.
In compact apartments and small homes, you may not have perfect placement options. Aim for the best compromise: close enough to sense real smoke early, but not directly above cooking or shower steam whenever you can avoid it.
Example values for illustration.
| Home area | Alarm type to expect | Key placement note |
|---|---|---|
| Bedrooms / sleeping rooms | Smoke alarm | One inside each bedroom or sleeping area |
| Hallway outside bedrooms | Smoke alarm | Central on ceiling or high on wall |
| Living room / main room | Smoke alarm | On the ceiling away from ceiling fans if possible |
| Stairways between levels | Smoke alarm | At top of stairs, ceiling or high wall nearby |
| Basement (with fuel-burning equipment) | Smoke and CO alarms | Near the bottom of stairs and near equipment area |
| Near attached garage entry door | CO alarm | In the home side, not inside the garage |
| Kitchen-adjacent area | Smoke alarm | Outside cooking steam path, several feet from stove |
| Upper floor hallway in multistory home | Smoke alarm | Ceiling placement to catch rising smoke |
Where to Place Carbon Monoxide Alarms
Carbon monoxide is colorless and odorless. It comes from incomplete burning of fuels such as natural gas, propane, heating oil, wood, and gasoline. CO alarms are especially important in homes with fuel-burning appliances or attached garages.
General CO alarm locations
Common placement guidance for CO alarms includes:
- On every level of the home, including basements with fuel-burning equipment.
- Outside sleeping areas, where sound will wake occupants at night.
- Near but not inside attached garages, on the home side of the door connecting garage and living space.
Some modern devices combine smoke and CO detection in one unit; others are separate. Either way, placement should cover each sleeping area and each level of the home.
Height and room selection for CO alarms
Unlike smoke, carbon monoxide can mix fairly evenly with air in a room. Many household CO alarms are designed to work at typical breathing height. General tips:
- Follow the manufacturer’s height recommendation for your specific alarm type.
- Avoid directly above fuel-burning appliances where brief, harmless bursts could trigger nuisance alarms.
- Keep alarms away from very humid areas like directly next to showers.
If you rent, you may not get to choose exact locations. You can still ask your landlord or property manager how many CO alarms are in your unit and where they are, and request additional alarms if coverage seems minimal compared with typical guidance.
Special considerations: apartments, renters, and small spaces
Living situations vary. Here are some practical notes:
- Apartment with central heating: Even if your unit does not have its own furnace, an attached garage, or a gas stove, a CO alarm near the bedroom area is still a simple precaution.
- Older rentals: Ask how old the alarms are, whether they are interconnected, and what your lease says about batteries. If allowed, you can add a plug-in CO alarm with a battery backup for your own peace of mind.
- Small studio: A single combined smoke/CO alarm in the main living/sleeping area, plus any required by local rules, is often the most realistic setup.
Testing Alarms and Checking Batteries
Alarms are only useful if they work when you need them. Testing them regularly and paying attention to low-battery chirps keeps your home safer with very little time investment.
How often to test smoke and CO alarms
A simple habit is to test all alarms once a month. It usually takes less than a minute:
- Press and hold the test button until you hear the alarm sound.
- Confirm the alarm is loud enough to hear in bedrooms with doors closed.
- If the sound is weak, intermittent, or silent, replace batteries or the unit according to instructions.
Note that the test button checks the alarm’s electronics and speaker, not the air in the room. It does not require smoke or CO to function.
Battery types and practical schedules
Common residential alarms use one of several power setups:
- Replaceable batteries: Often standard battery sizes that you can change yourself.
- Long-life sealed batteries: Designed to last for many years until the whole unit is replaced.
- Hardwired alarms: Connected to household power, usually with a backup battery.
Practical routines:
- For replaceable batteries, set a recurring reminder once or twice a year to change them, even if they still work.
- For sealed-battery units, note the installation date on the side with a marker so you know when they approach end-of-life.
- For hardwired units, test monthly and replace the backup battery on a set schedule (for example, once a year) or when you get a low-battery chirp.
Recognizing low-battery and error signals
Most alarms use different sounds and lights to signal issues. Tone patterns can vary, but you may notice:
- Short chirp every minute or so: Often a low-battery signal.
- Series of loud continuous beeps: Active alarm condition for smoke or CO.
- Chirps plus indicator light patterns: May signal a problem with the sensor or overall unit.
If you are not sure what a sound means, check the label or instruction sheet for your specific alarm model. When in doubt, treat sustained, repeating loud alarms seriously and follow your home evacuation or ventilation plan.
Basic Maintenance and Cleaning
Dust, grease, and age can gradually reduce how well alarms work. Light maintenance a few times a year helps keep them in good shape.
Simple cleaning steps
Every few months, or when you are doing a seasonal home reset:
- Gently vacuum around vents on the alarm using a soft brush attachment to remove dust and cobwebs.
- Wipe the housing with a slightly damp cloth (avoiding the openings) to remove surface grime.
- Avoid spray cleaners, air fresheners, or paint on or near the alarm, as residues can affect sensors.
If a kitchen-adjacent alarm collects grease, a careful wipe of the outside casing can help, but avoid getting liquid into the detector openings.
Replacing alarms as they age
Smoke and CO sensors do not last forever. Many household alarm units are designed with a service life in the approximate range of one to two decades, depending on the device and sensor type. After that, they may chirp or display a signal to indicate it is time to replace the entire unit.
To stay organized:
- Find the manufacture or replacement date on each alarm. It is often printed on the back.
- Write a “replace by” year in marker where you can easily see it.
- Keep a simple list or note on your fridge or phone with alarm locations and replacement dates.
When replacing an alarm, consider whether you want the same type or a combined smoke/CO unit, and whether local codes in your area call for hardwired, interconnected alarms in certain locations.
What to do with old alarms
Old alarms often include electronic components. Instead of throwing them in the regular trash, you can:
- Check for local electronics recycling options.
- Remove and recycle batteries separately where allowed.
- Ask your municipality about household hazardous waste guidelines, if applicable.
Integrating Alarms into Your Home Readiness Plan
Smoke and CO alarms work best as part of a simple, realistic home readiness plan that fits your space, family, and routines. They connect directly to other basics like blackout planning, safe heating, and quick evacuations.
Linking alarms with escape and meetup plans
An alarm sounding in the middle of the night can be disorienting. Decide in advance what each person will do:
- Pick at least two ways out of each sleeping area if possible (such as door and window).
- Agree on a meeting spot outside the home, such as a nearby tree or corner.
- Practice a short walk-through with kids, seniors, and anyone who may need help.
- Plan who will assist young children, pets, or mobility-limited family members if alarms sound.
Keep doors and pathways clear so that if an alarm goes off during an outage, storm, or other stressful moment, you are not tripping over clutter or blocked exits.
Alarms during power outages
Many emergencies that cause power loss also increase fire and CO risks. Examples include using alternate heating sources, running portable generators, or bringing outdoor cooking equipment too close to the home.
To stay ready during outages:
- Confirm battery backups are fresh in hardwired alarms before storm seasons.
- Do not rely on plug-in CO alarms alone if they lack a battery backup; they may go offline when power fails.
- Place portable generators and fuel-burning heaters only in locations allowed by safety guidance, which is normally far away from enclosed living spaces.
- Review your ventilation habits if you must cook indoors with gas during an outage, such as using a range hood or opening a window if conditions allow.
Renters, roommates, and shared responsibility
In many U.S. locations, landlords are responsible for installing required alarms, but tenants are responsible for not disabling them and may be asked to handle simple battery changes. If you share housing:
- Walk through your space with roommates to count how many alarms you have and where they are.
- Agree on who will change batteries and how you will share the small cost.
- Decide together on a basic response plan if an alarm goes off.
In multigenerational households, show older family members and kids how to recognize test tones versus real alarm patterns, and where the test buttons are.
Example values for illustration.
| Lighting type | Battery type | Pros and cons | Storage tip |
|---|---|---|---|
| Small flashlight | Common disposable cells | Easy to store and share, but batteries can drain over time | Keep near beds so alarms waking you at night are paired with quick light |
| Headlamp | Rechargeable or disposable | Hands-free for carrying kids or pets; remember to recharge | Store by the door to use during alarm-triggered evacuations |
| Lantern | Multiple cells or built-in pack | Good area lighting; heavier and bulkier | Place in common room where alarms are located |
| Simple clip-on light | Small coin or AAA cells | Compact but shorter runtime | Attach to go-bags near the main exit route |
| Rechargeable work light | Internal battery | Bright and versatile; depends on charging access | Charge during normal weeks so it is ready for outages |
| Battery-powered night-light | Small cells | Comforting for kids; limited brightness | Use in hallways so alarms and exits are visible in the dark |
Keeping It Manageable: A Simple Annual Routine
You do not need a complex system to keep smoke and CO alarms ready. A short, repeatable routine works best over the long term. You might:
- Choose a fixed month each year to replace standard batteries, check manufacture dates, and lightly clean alarms.
- Set a phone reminder for monthly test days, such as the first weekend of each month.
- Combine alarm checks with other simple tasks, such as flipping mattresses or changing HVAC filters, so they become part of a single seasonal habit.
For families, turning alarm checks into a brief, calm household activity helps kids recognize the sounds and understand what to do if they hear them unexpectedly. Over time, this low-key, regular attention keeps your home better prepared for the everyday surprises that matter most.
Frequently asked questions
What is the best smoke and CO alarm placement for a small apartment or studio?
In a small apartment or studio, place a combined smoke/CO unit or separate units in the main living/sleeping area and outside the kitchen if possible. Ensure the alarm is on the ceiling or high on a wall, and keep it several feet from cooking surfaces to reduce nuisance triggers.
How high should I mount smoke alarms and where should CO alarms be placed vertically?
Smoke alarms should be mounted on the ceiling when possible, or high on the wall within about a foot of the ceiling; avoid corners. CO alarms should be installed per the manufacturer’s guidance—many work well at typical breathing height—while avoiding direct placement over fuel-burning appliances.
Can I install a CO alarm inside my attached garage or directly above my stove?
A CO alarm should be placed on the home side of the door that connects an attached garage, not typically inside the garage itself; this helps detect CO that enters living spaces. Do not place smoke alarms directly above stoves or ovens where regular cooking steam and smoke will cause frequent nuisance alarms.
How often should I test alarms and replace batteries or the alarm unit?
Test all smoke and CO alarms once a month using the test button. Replace standard batteries once or twice a year or when you hear low-battery chirps; sealed long-life units should be replaced according to their service-life marking (often 10–20 years).
What should renters do if their unit lacks adequate smoke and CO alarm placement?
Tenants should check with their landlord about required alarms and request additional units if coverage is insufficient. If permitted, renters can add a plug-in alarm with battery backup or a battery-powered unit to improve placement near sleeping areas.
Recommended next:
- Simple checklists and realistic planning
- Water, power, lighting, and pantry basics
- Family plans (kids, pets, seniors) and seasonal prep

Water Shutoff Valve Checklist: Find, Label, and Test It Before a Leak

Emergency Handwashing Station: How to Set One Up at Home

Medication Refrigeration During a Power Outage: Cooler Plan and Safety Steps

Home Inventory for Insurance: A Quick Documentation Guide

Electrical Safety During Outages: Cords, Chargers, and Overloads

Safe Food and Water Handling During Emergencies: Simple Rules